Managing Worlds

Managing Worlds
If you'd like to import ALL your files from another hosting company, please follow our Server Importer guide instead!
Importing Worlds
Depending on your specific edition and world, there are a couple of methods of importing worlds.
From Java Edition Single Player
If you have a single player world in Java Edition, this is what you need to do:
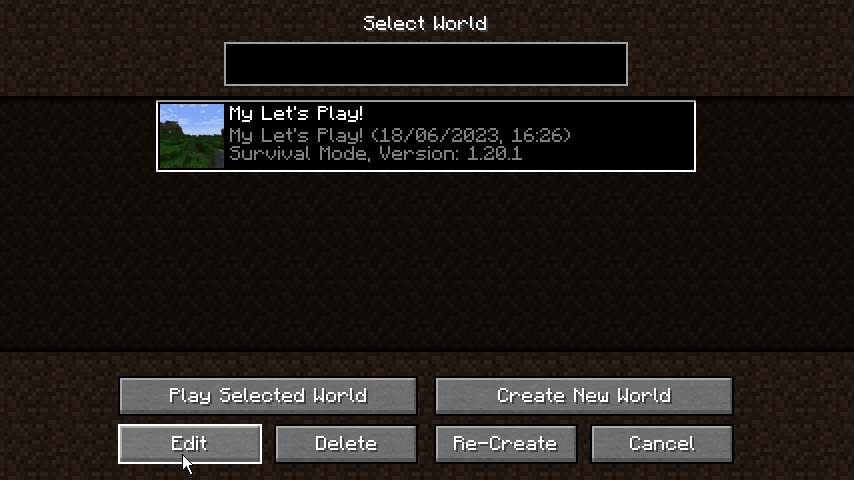
Open the single player menu and select your world. Then, press the 'Edit' button:
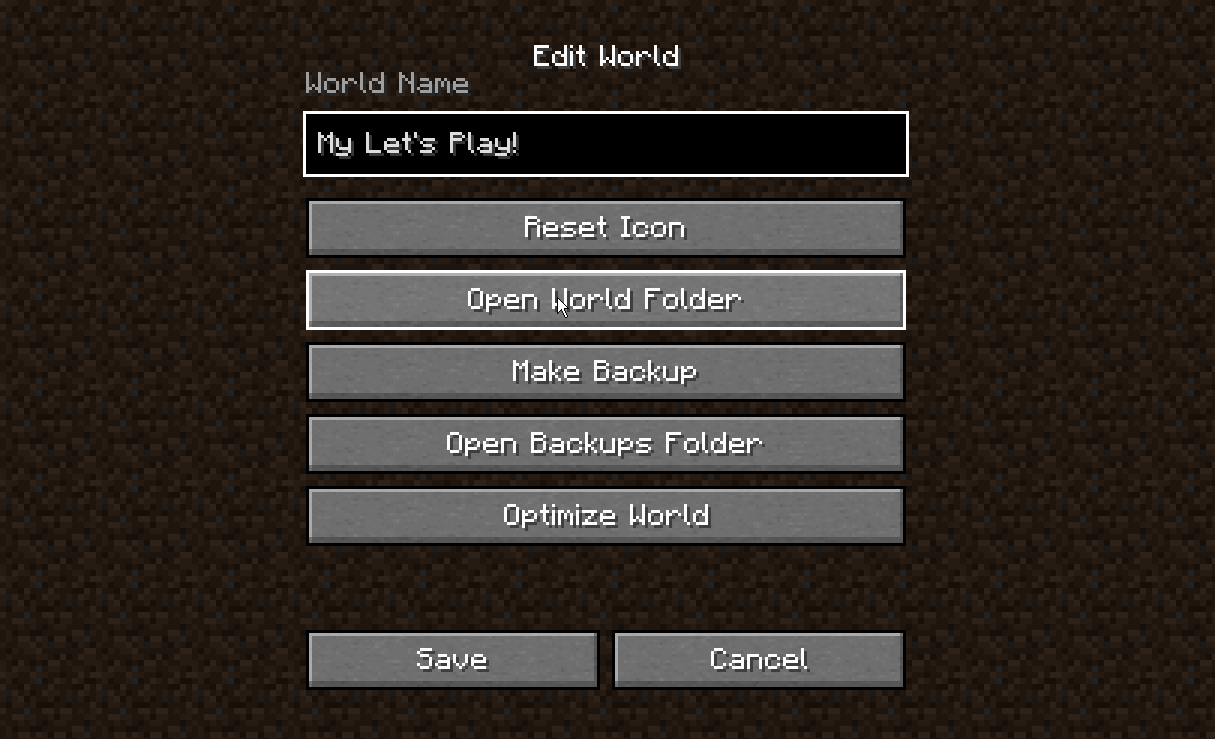
Here, press the 'Open World Folder' button:
Then, select all the files within the open directory and right click. Select 'Send To' and 'Compressed (zipped) folder':
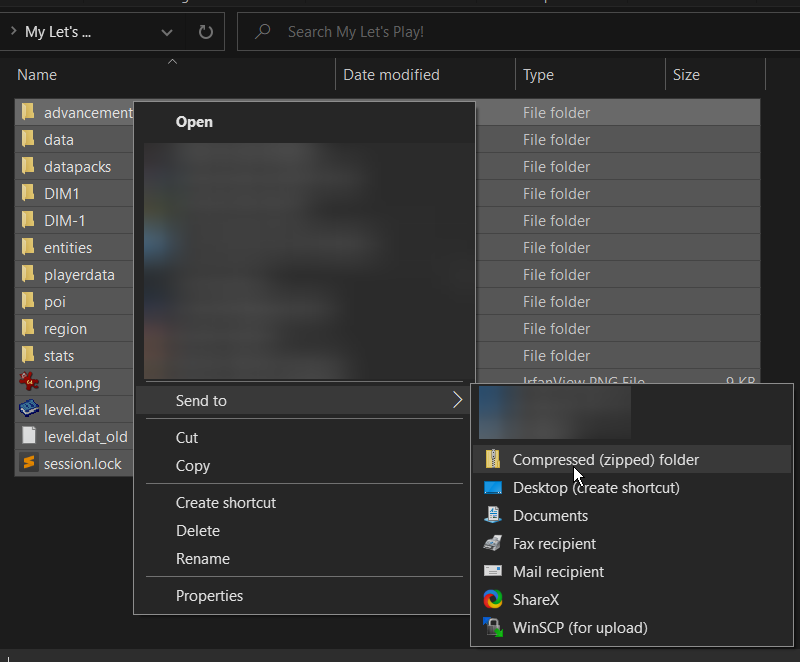 You may get a warning about empty folders being skipped but that is okay!
Next, follow our guide on connecting to your server with an SFTP client. In most cases, your world files will be fairly large, so it's best to use a dedicated file transfer protocol, instead of the built-in File Manager.
Once connected via SFTP, right click in SFTP and create a new folder, such as my-world and open it.
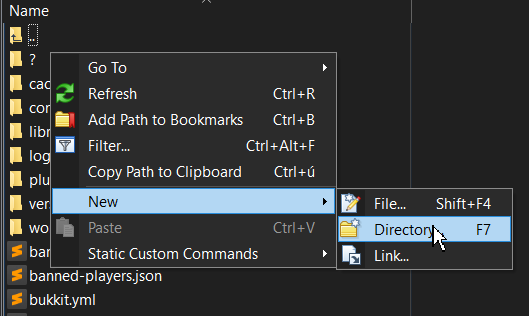
Drag & drop the ZIP file you created previously and wait until it finishes uploading.
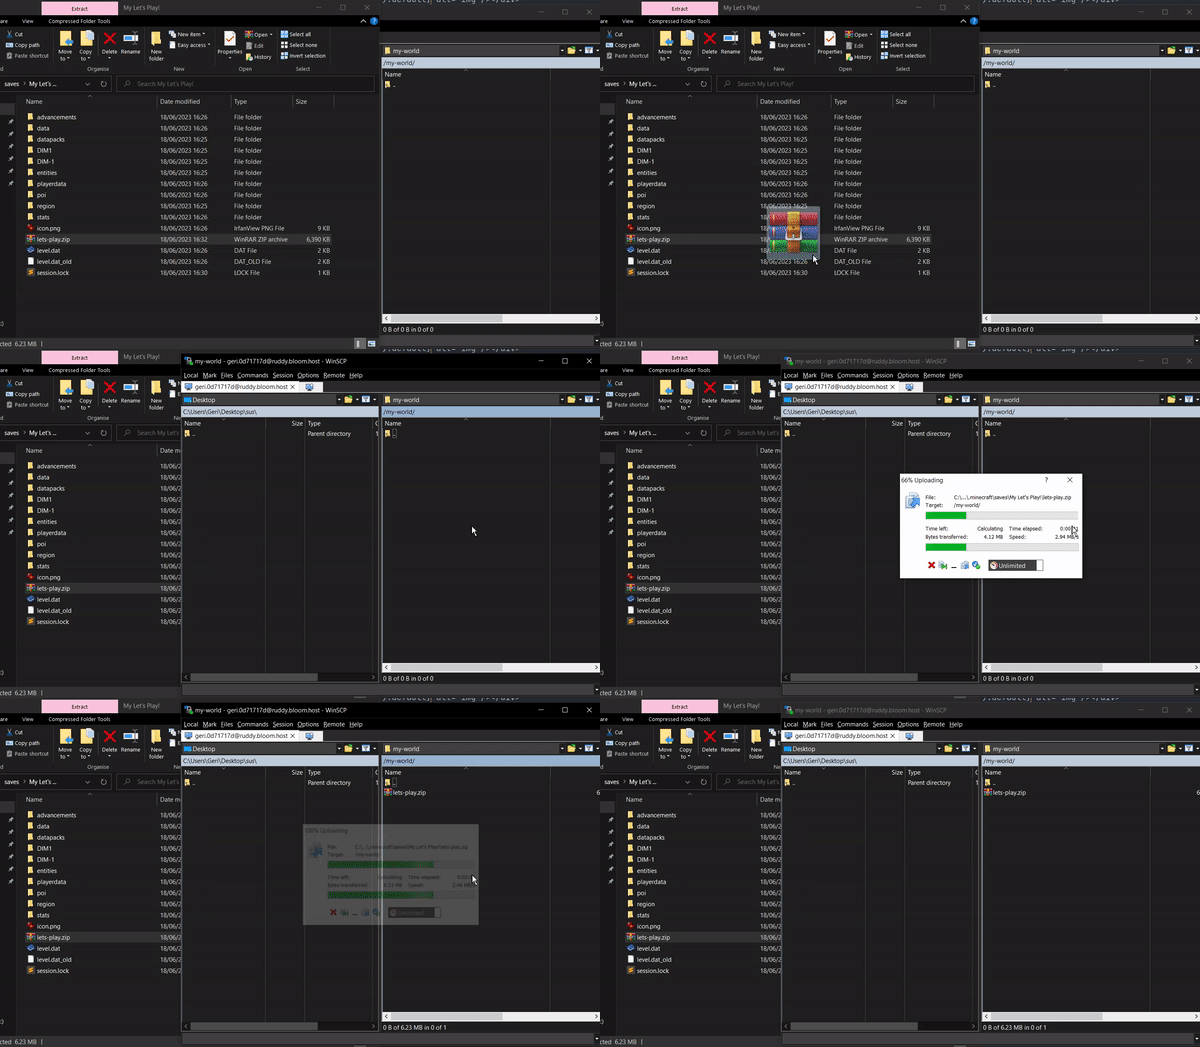
Once that's done, head over to the 'File Manager' tab of the panel and locate and your folder.
Within, press the '...' button next to your ZIP and click 'Unarchive'. This may also take a few minutes depending on the size of your server.
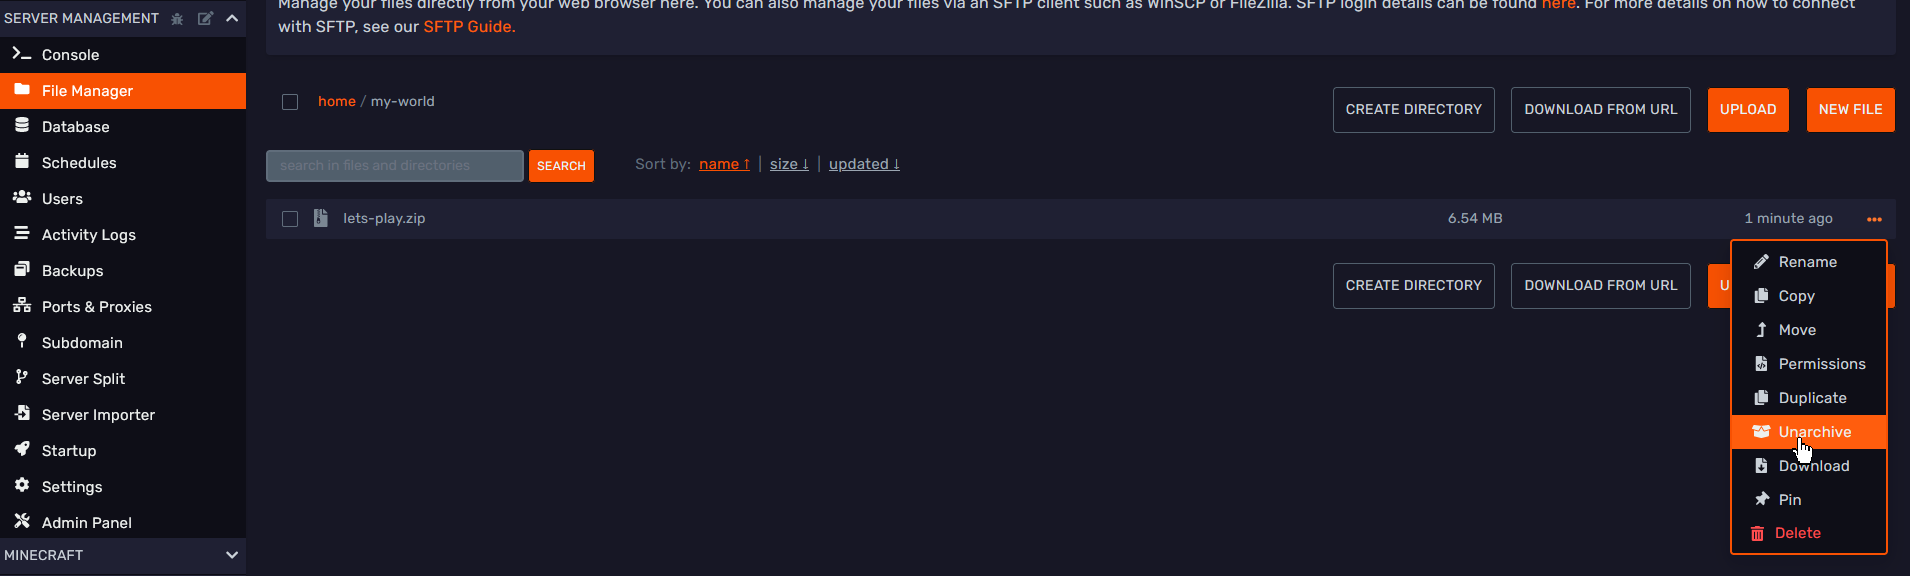
After unzipping, here is how it should generally look.
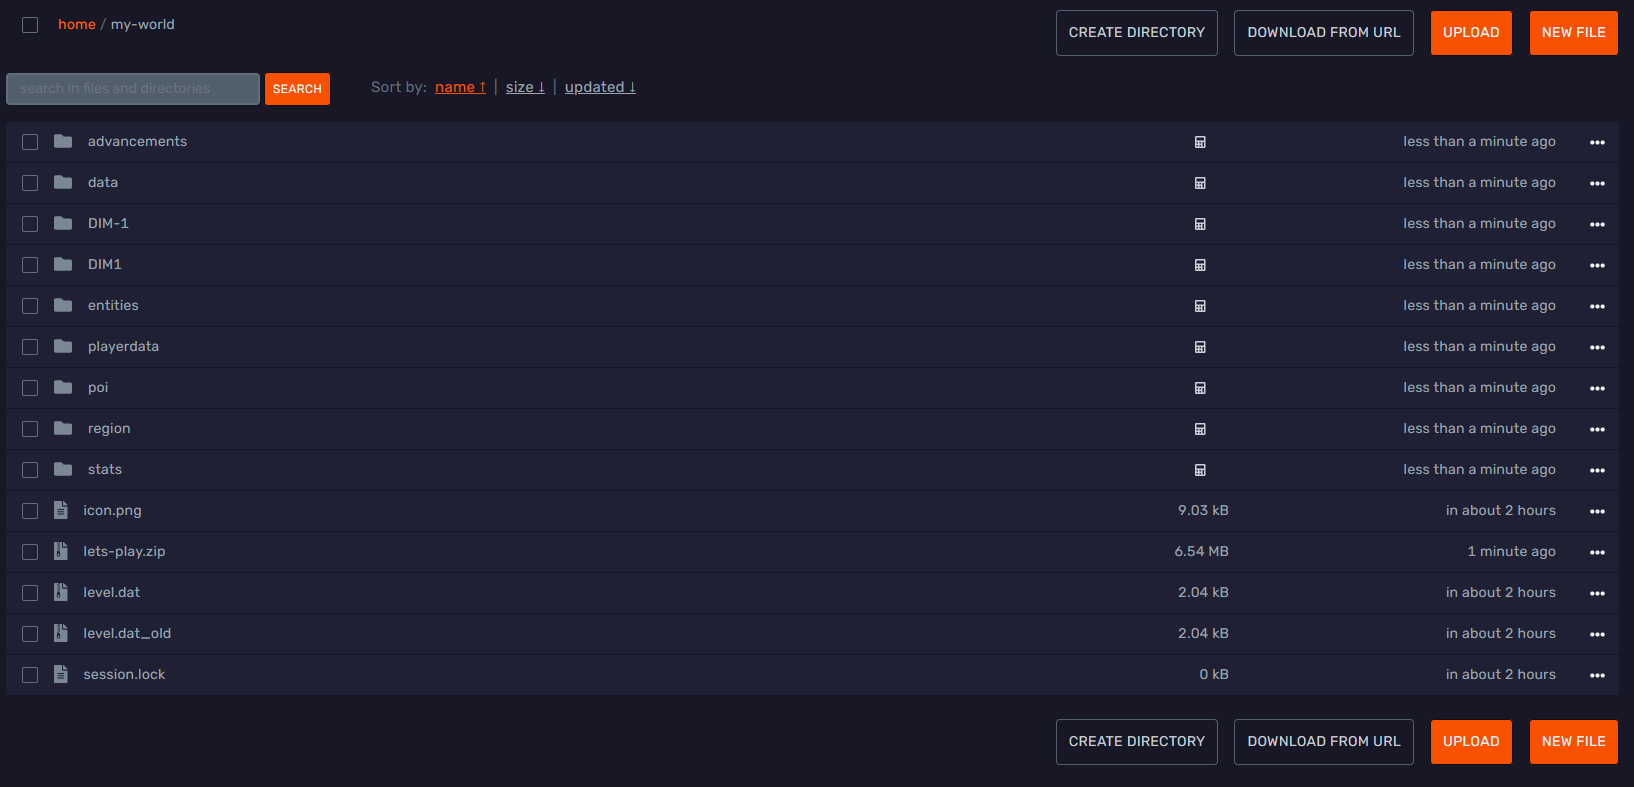
Now, if you'd like this to be your main world, open the server.properties file in the main directory of your server and ensure the level-name= setting matches with the folder that you created before:

Alternatively, if you'd like to use a plugin or mod such as Multiverse-Core, you can import it using the folder's name.
In our example, for Multiverse-Core, you'd do /mvimport my-world NORMAL
That's it! Make sure to restart your server to apply the changes.
From Java Realms
If you have a Minecraft Realm on Java Edition, this is what you need to do:
Open the Realm menu, select your Realm and press 'Configure':
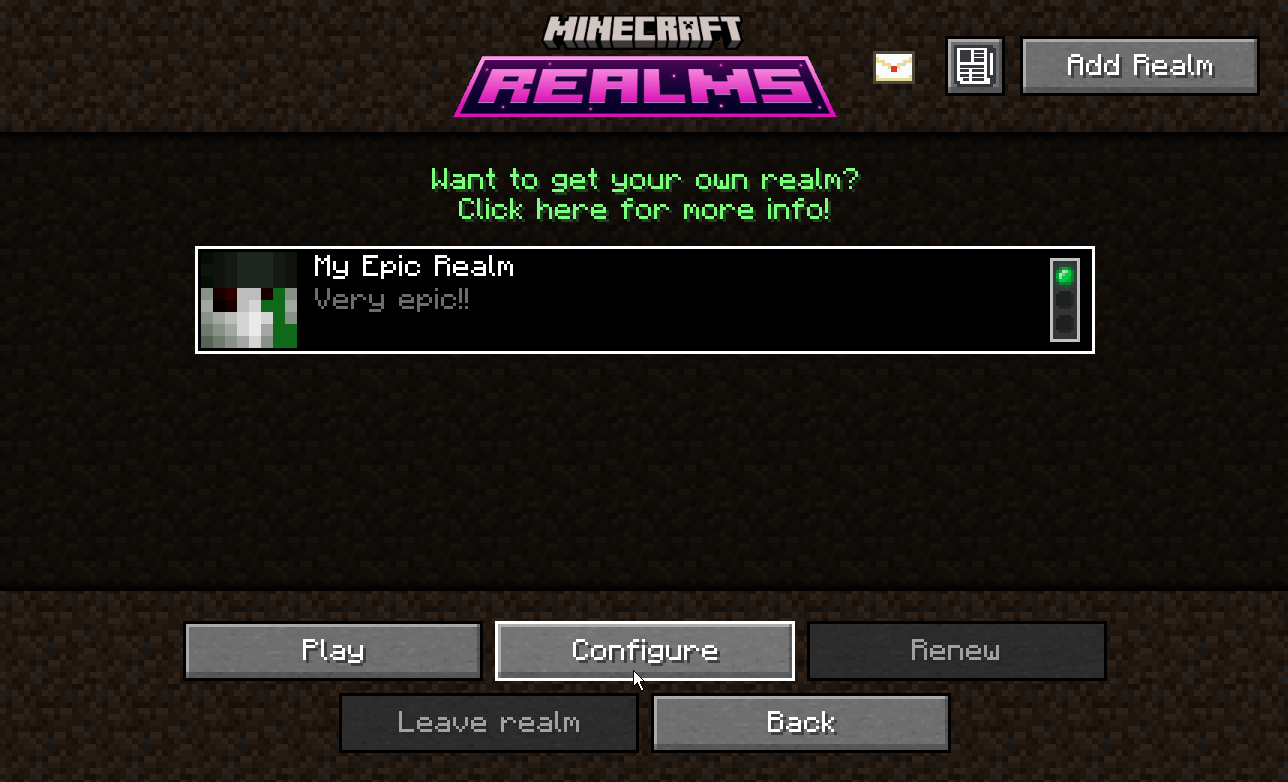
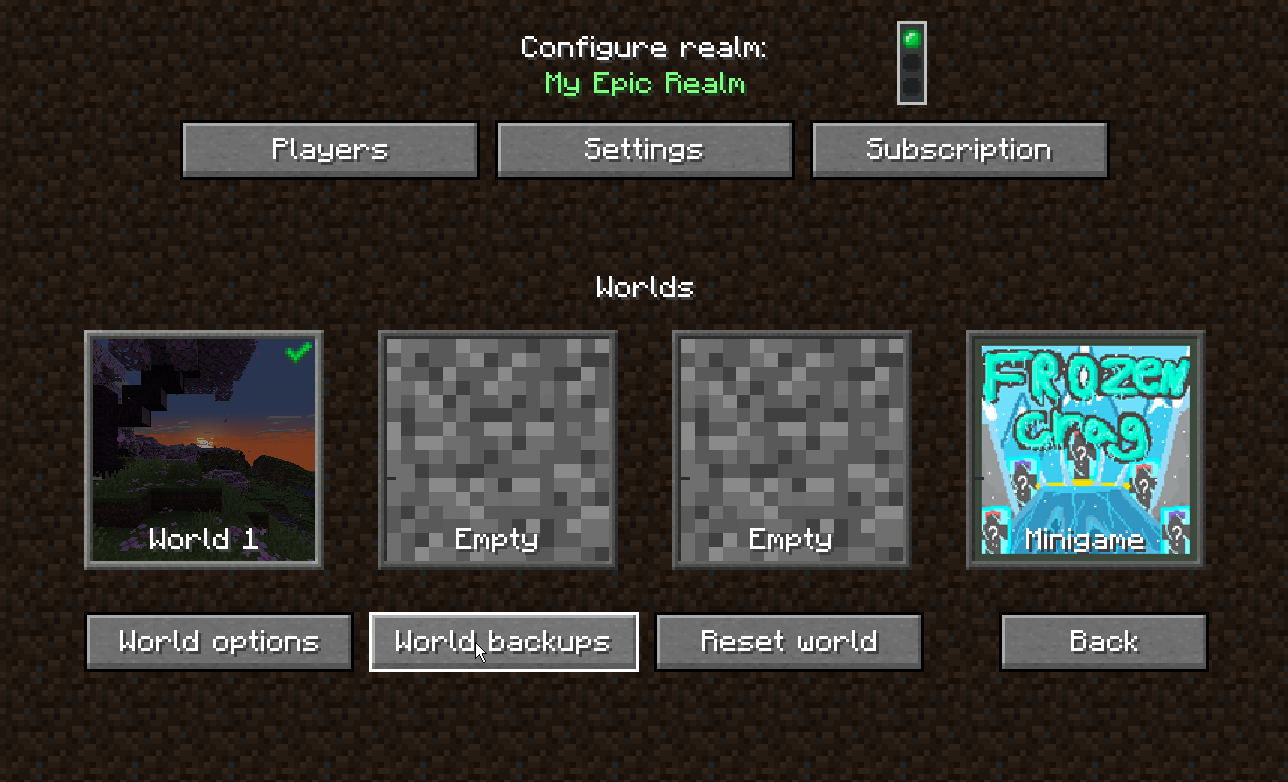
Switch to the world you'd like to import to your Bloom server by clicking it, if you haven't already.
There press the 'World backups' button:
Lastly, press the 'Download latest' button which will download the very latest backup of your Realm to your single player saves folder:
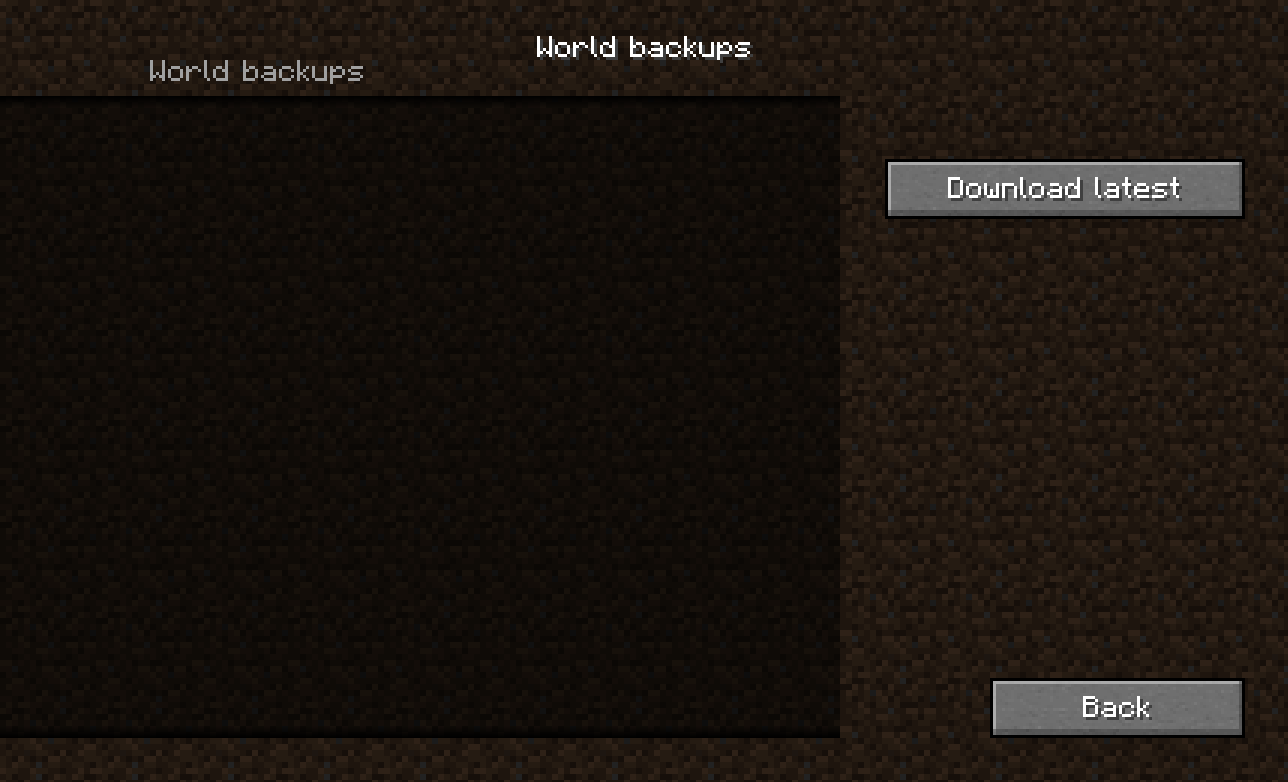
That's it! Now you can follow the 'From Java Edition Single Player' chapter to import your Realm world!
From Bedrock Edition Single Player
If you have a single player world in Bedrock Edition, this is what you need to do:
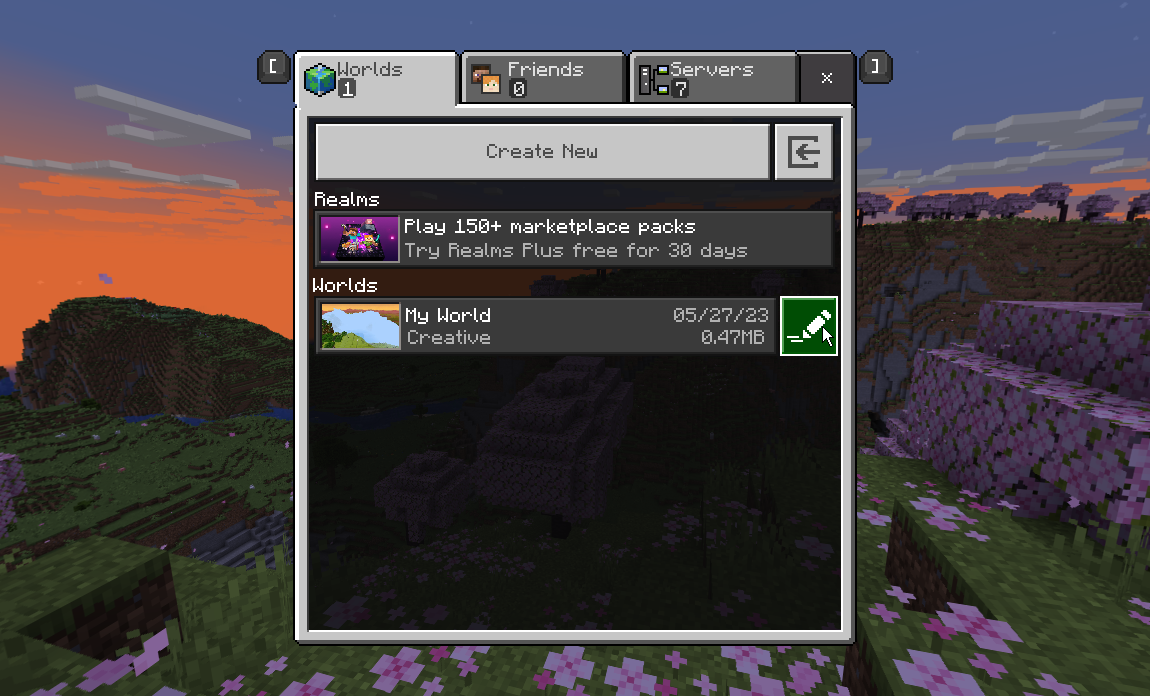
Open the worlds list and press the edit button next to your desired world:
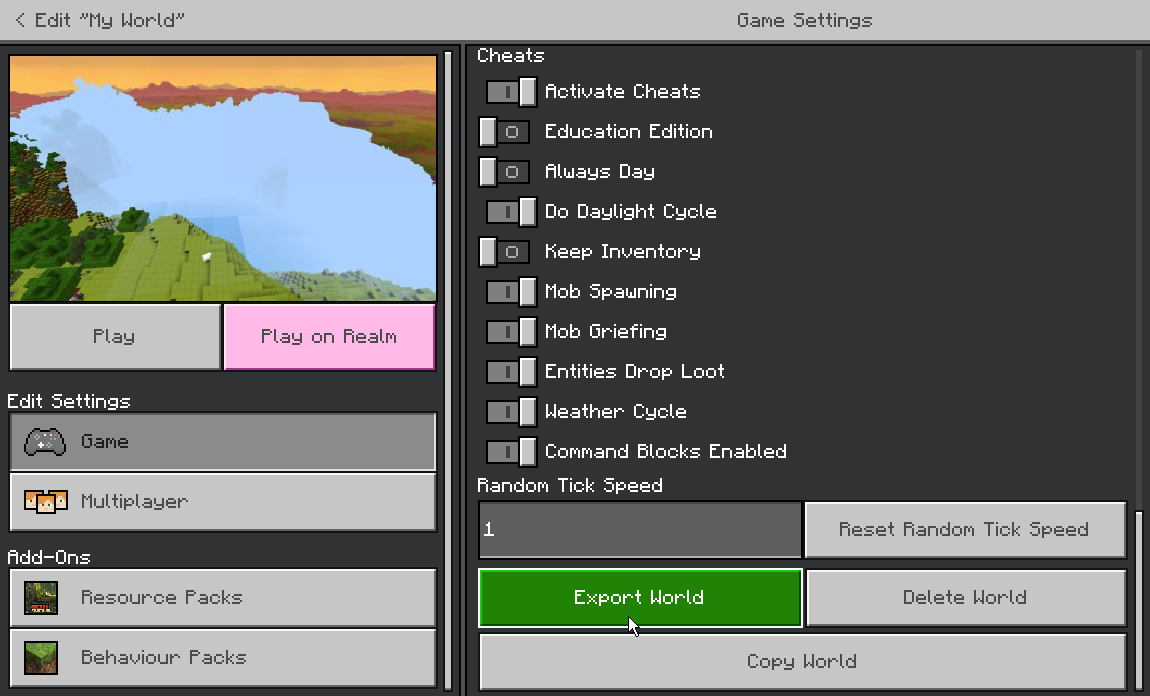
Scroll down to the very bottom of the main page and press 'Export World':
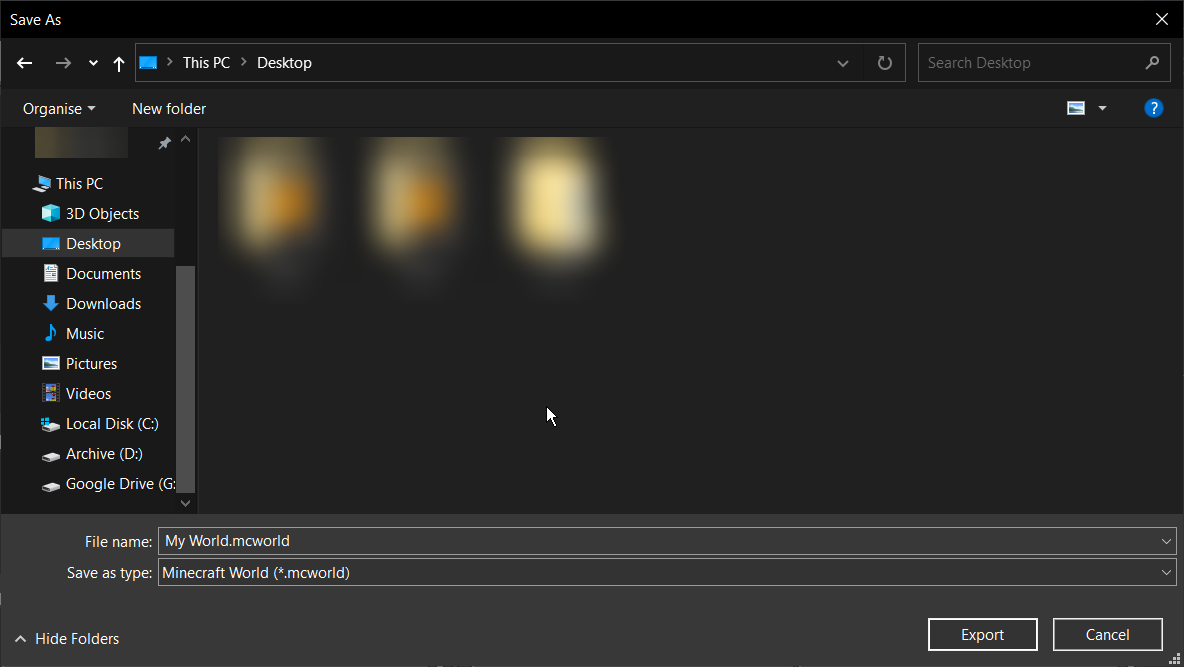
Select your desktop, or another easy to access location:
Next, follow our guide on connecting to your server with an SFTP client. In most cases, your world files will be fairly large, so it's best to use a dedicated file transfer protocol, instead of the built-in File Manager.
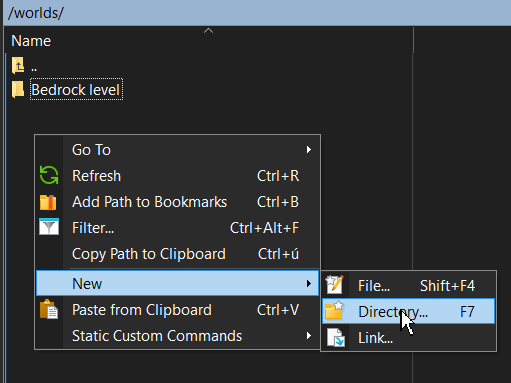
Once connected via SFTP, open the worlds directory and create a new folder, such as my-world and open it.
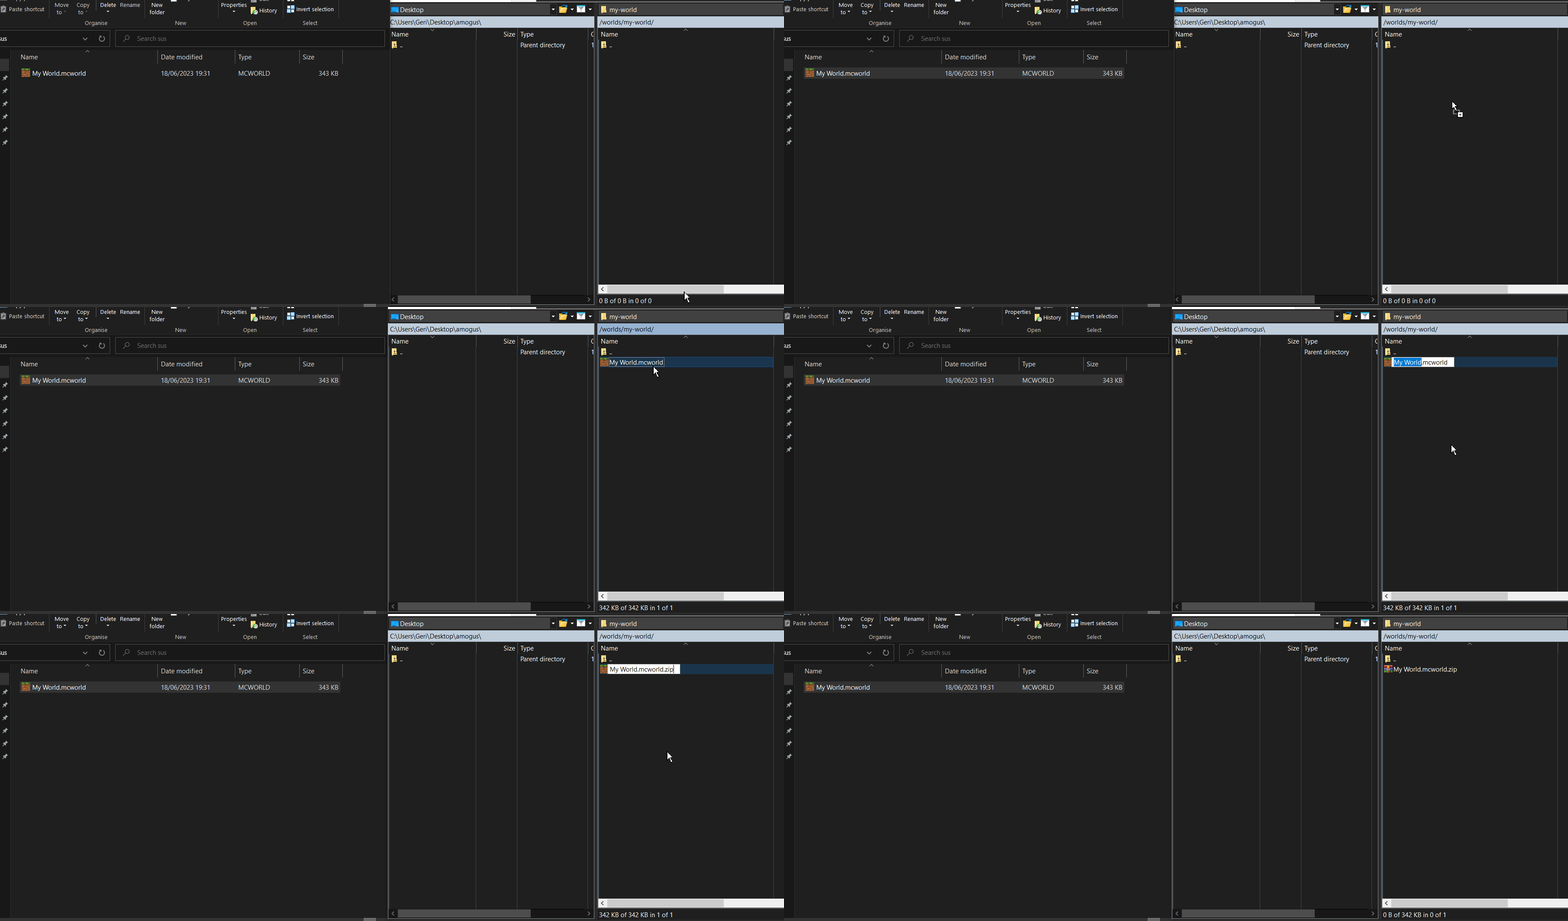
Drag & drop the world file you exported previously and wait until it finishes uploading.
Once it does, rename it, so instead of ending in .mcworld, it ends in .zip. The rest of the name does not matter.
Once that's done, head over to the 'File Manager' tab of the panel and locate and your folder in the worlds directory.
Then, press the '...' button next to your ZIP and click 'Unarchive'. This may also take a few minutes depending on the size of your server.
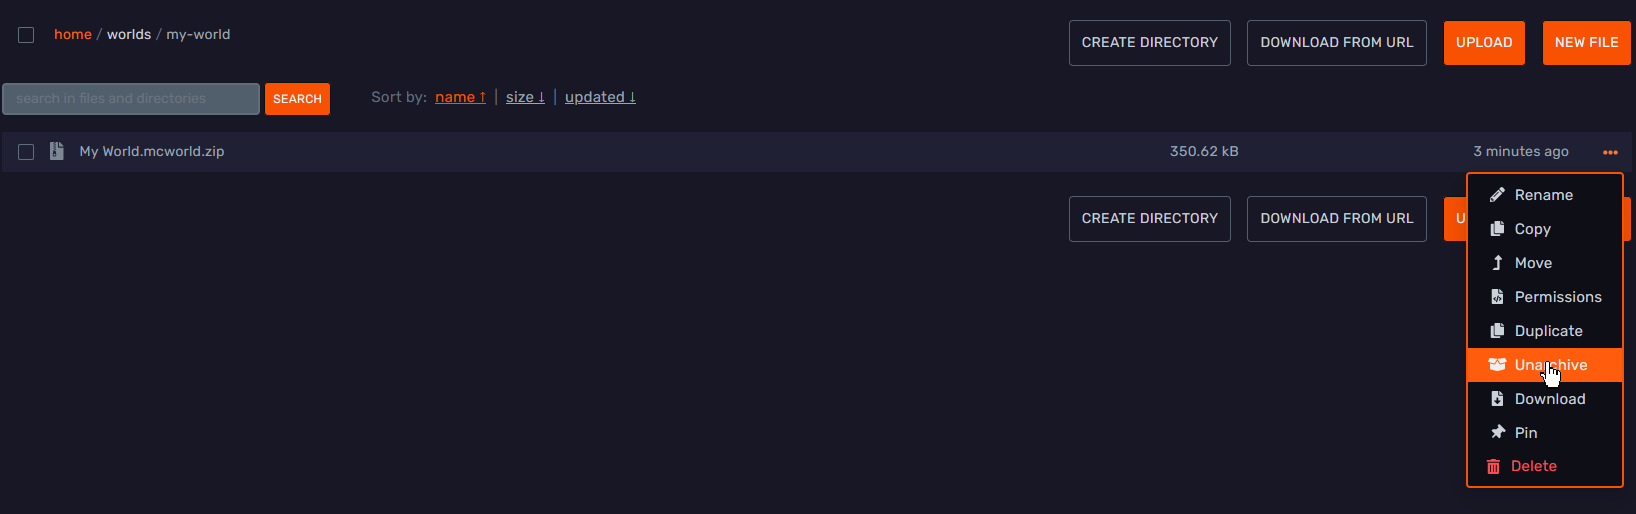
After unzipping, here is how it should generally look.

Lastly, open the server.properties file in the main directory of your server and ensure the level-name= setting matches with the folder that you created before:
That's it! Make sure to restart your server to apply the changes.
Resetting Worlds
See our full world reset guide!